Regular flow meter calibration is essential for ensuring your device continues to provide accurate results. Not carrying out this vital process can result in your flow meter recording incorrect data and could result in a failed MCERTS inspection. In this guide we’ll be explaining how to calibrate a flow meter.
How to calibrate an electromagnetic flow meter
You might be surprised to learn that the first step to calibrating an electromagnetic flow meter actually takes place before the meter is even installed. This is because our preferred method for calibration is by using a time of flight meter, which requires a longer approach channel than an electromagnetic device. Where possible, a flow measurement system should be designed to allow for calibration from the start.
If the conditions don’t allow for time of flight testing, there are alternative methods we can use:
Loop testing
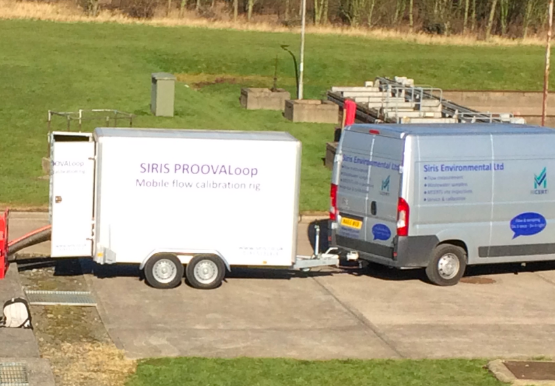
Loop testing involves diverting flow through a specialist test rig on-site, such as the SIRIS PROOVAloop. This solution is ideal for difficult to access flow meters, where the cost of excavating an electromagnetic meter or building an access chamber is prohibitive. Flow is pumped through the PROOVAloop which contains a test rig to verify the results.

Full wet calibration
As a last resort, the flow meter can be lifted out and returned to the manufacturer for a full wet calibration. We really don’t recommend this method and seek to avoid it wherever possible. This is because moving the flow meter is risky – knocking it during transit can damage it or impact the calibration.
Fingerprint checks
Most manufacturers offer electronic verification, or “fingerprint checks”. When an electromagnetic flow meter is originally calibrated, its unique set of test values are recorded. When the time comes to re-calibrate, we can verify it against these original test values, which are unique to that sensor. Values are known as a “fingerprint” and an electronic test checks those values, gives operator a good indication that a meter is still operating as it was when it came off the calibration test rig. This test however does not measure flow rate.
How to calibrate an open channel flow meter
When using any open channel primary structure, such as V notch and rectangular weirs or a flume, to determine flow rate, it’s likely you will be using an air ranging ultrasonic sensor (or more recently, radar). Both these sensors simply measure depth or head. When calibrating this type of flow meter, we have to check the measurements for depth and head are correct.
The best way to measure is by using a calibration plate – also known as a bounce plate or swing plate. The plate is positioned in path of level sensor to create false head. The plate is accurately measured using an engineer’s level, steel rule or staff gauge and referenced against a hydraulic structure’s true zero, for example the bottom of the V notch.
It should be noted that for thin plate weirs, because of surface tension, the gauge zero cannot be determined with sufficient accuracy by reading the water level alone (i.e. if you stop the flow and measure there could still be water on the notch which means it won’t be measuring true zero)
When we calibrate with a plate we check the head error, zero error, and also take echo profile for extra accuracy, which provides a good snapshot to show the performance of sensor.
How often should you calibrate a flow meter?
We recommend that your flow meter is calibrated at least every six months to ensure it continues to provide the most accurate results. Get in touch to talk to our experts about our calibration services.